

Upcycling Old Furniture with Chalk Paint and Wax
Why Chalk Paint Brings Old Wood Back to Life
There's something quietly satisfying about rescuing a piece of furniture that's seen better days. A wobbly bedside table from a car boot sale, a pine dresser gone orange with age, a chest of drawers inherited from a relative — all of them can be brought back into use with a pot of chalk paint, a little patience and a protective wax finish. Chalk paint suits upcycling because it grips almost any surface without hours of sanding or a separate primer. Its velvety matt finish softens minor imperfections rather than highlighting them, which is exactly what you want on a much-loved piece with knocks and dents. Best of all, it's forgiving: if you don't like the first coat, add another, and if you change your mind about the colour, paint straight over it.
Gathering Your Kit
- A tin of chalk paint — 500ml covers a small chest of drawers with two coats to spare.
- A 50mm synthetic brush for large panels, plus a 25mm brush for mouldings and corners.
- A foam roller if you prefer a smoother, less textured finish on flat tops.
- Fine sandpaper (120 and 180 grit), a sanding block and a lint-free cloth.
- A dust sheet, a pot of clear wax and plenty of ventilation.
- Optional: dark or white wax for depth, and a little decorator's filler for chips.
Work out of direct sun. Chalk paint dries quickly, and a warm draught can set brush marks before you've had a chance to lay off the final stroke.
Preparation: The Step Most People Rush
You can skip the heavy sanding, but you cannot skip the cleaning. Years of furniture polish, cooking grease and everyday grime will stop the paint adhering, and it will show up as flaking patches within weeks. Wipe the whole piece with a warm solution of sugar soap or a mild degreaser, rinse with clean water and let it dry completely. Then lightly key the surface with 180-grit paper — you're not stripping the finish, just taking the shine off so the paint has something to hold onto. Give extra attention to worn edges and chipped veneer. Fill deep scratches with fine filler, sand flush and dust everything down.
On knotty pine, or anything previously stained dark, seal the knots with a shellac-based blocker first. Otherwise the resin will bleed through your pale grey within a day or two. Take off drawers, knobs and handles as you go, and wash reusable handles in warm soapy water.
Applying Chalk Paint Like a Pro
Stir the paint thoroughly — it separates, and a good stir makes a real difference to the finish. Most tins are ready to use, but if the paint feels thick, add water a tablespoon at a time until it flows like double cream. Two thin coats always beat one thick one. Load the brush lightly, offload any excess onto the rim of the tin, and work in long, even strokes in one direction. Don't overwork an area; chalk paint begins to dry within minutes and dragging a brush through half-dry paint leaves ridges.
Leave two to four hours between coats, and don't worry about the patchy, chalky look after the first — that's normal. Once the second coat is dry, check the piece in good light. If the wood still shows through, a third thin coat on the most visible areas will even it out. On tabletops, apply with a foam roller and lay off lightly with a brush for the smoothest result.
Waxing for a Hard-Wearing Finish
Wax is what turns a painted piece into furniture you can actually use. Clear wax adds a soft sheen and a layer of protection against spills and sticky fingers. Apply it with a lint-free cloth or wax brush, rubbing a thin film into the paint in small circles. Thin is the word — too much wax stays tacky and attracts dust. Leave it for twenty to thirty minutes, then buff briskly with a clean cloth until the surface feels dry and smooth.
For character, work a touch of dark wax into mouldings, corners and carved detail, softening it back with clear wax. White wax over a pale base gives a gentle limed effect. Let the wax cure for at least twenty-four hours before loading the piece, and re-wax high-traffic surfaces once a year. Skip silicone-based polishes, which break the wax down.
Choosing Colours and Finishes for Each Room
Colour is where upcycling gets fun, but think about the room before you open the tin. In a living room, soft greys, warm off-whites and muted greens sit happily with natural textiles and won't fight patterned wallpaper. Kitchens and hallways take harder knocks, so choose a deeper shade — navy, charcoal, olive — and add two coats of wax or a wipe-on topcoat for extra durability. Bedrooms carry gentler tones beautifully: a chalky pink, a pale blue, or simple white with dark wax worked into the corners for a softly aged look.
One last tip: paint the inside edges of drawers and the back of the piece too, even where nobody looks. It stops raw wood showing at awkward angles and makes the whole thing feel properly finished. Take your time, and enjoy it — the beauty of chalk paint is that nothing is permanent, and there's always another coat.
tag: DIY & Craft

Henry Ashworth Author
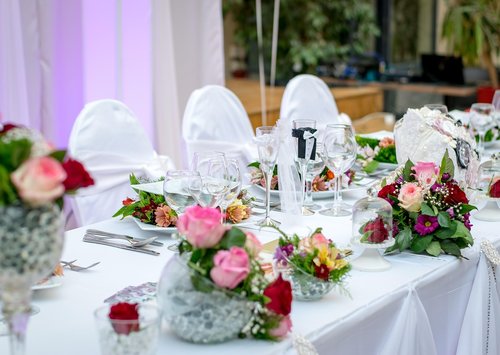
Use dried leaves, candlelight and simple linen to create a welcoming table that celebrates the harvest without spending a fortune.
YOU MAY ALSO LIKE
Seasonal Table Settings for Autumn Dinners at Home
Sep 11
10Clever storage, slim appliances and vertical shelving can help a narrow kitchen feel practical, airy and easy to cook in.
read more
Making the Most of a Narrow Kitchen Layout
Sep 7
10Sort belongings into keep, donate and repair piles, then give every remaining item a clear home to maintain a peaceful space.
read moreInteriors
-

ERRIC CATONA
Insulate walls, add generous glazing and choose durable flooring to make a garden room comfortable in every season.
May 19, 2016 at 5.12 pm
Reply
ERRIC CATONA
Try unhurried breakfasts, a walk without a podcast and an evening with candles to restore a sense of calm.
May 19, 2016 at 5.12 pm
Reply -
ERRIC CATONA
Mix table lamps, wall sconces and dimmable bulbs to build soft layers of light that make evenings feel inviting.
May 19, 2016 at 5.12 pm
Reply
Home Cooking
Your email address will not be published.